Author: WaterTank Guides Editorial Team

  • What Is a Pressure Tank and How Is It Different from a Storage Tank?

    What Is a Pressure Tank and How Is It Different from a Storage Tank?

    A pressure tank holds a fixed volume of pressurized air and water to smooth out pump cycling and deliver steady water pressure to your fixtures. A storage tank holds bulk water at atmospheric pressure so you have a reserve supply, and it needs a separate pump to pressurize anything downstream. They solve two different problems, and most private well or booster-pump systems need both. This article covers how each one works, how to size a pressure tank correctly, and when a storage tank has to be added to the system.

    The quick answer

    A pressure tank is a small, sealed vessel — typically 20 to 86 gallons for a residential system — that stores a cushion of compressed air above (or around, in a bladder design) the water. As the pump pushes water in, the air compresses; when a fixture opens, that compressed air pushes water out without the pump switching on immediately. A storage tank is a much larger, unpressurized reservoir — anywhere from 200 gallons to tens of thousands of gallons — that exists purely to hold water in reserve. Plumbing codes based on the International Plumbing Code (IPC) and Uniform Plumbing Code (UPC) require a minimum working pressure of 20 psi at any fixture, with 40–60 psi considered normal residential range.

    FeaturePressure TankStorage Tank
    Typical size20–86 gallons200–50,000+ gallons
    ContentsCompressed air + waterWater only, atmospheric pressure
    JobSmooths pump cycling, maintains system pressureHolds a reserve water supply
    Needs a pump?Works with the well/booster pump directlyYes, a separate pump pressurizes the outlet

    Skip the math: Use the Water Pressure Calculator to check whether your current pressure falls inside the 40–60 psi comfort range.

    How the sizing calculation works

    Pressure tank size is driven by drawdown — the volume of water the tank delivers between the pump’s cut-in pressure (when it switches on) and cut-out pressure (when it switches off) — not the tank’s total volume. A typical residential pressure switch is set to 30/50 psi or 40/60 psi. Drawdown as a fraction of tank volume depends on the precharge: a bladder tank precharged 2 psi below cut-in typically yields 33–40% of its rated volume as usable drawdown at a 30/50 setting.

    Worked example: A household wants at least 2 minutes of pump run-time between cycles at a draw rate of 8 gallons per minute (GPM), which needs 16 gallons of drawdown. At a 30/50 psi switch setting with roughly 33% drawdown efficiency, the tank needs to be 16 ÷ 0.33 ≈ 48.5 gallons of rated volume — so a 62-gallon bladder tank (the next standard size up) is the correct choice, not a 20-gallon unit that would short-cycle the pump every 20–30 seconds.

    Key variables that change the answer

    Pressure switch setting. Moving from a 30/50 to a 40/60 setting narrows the pressure band the tank works within, which reduces drawdown by roughly 10–15% for the same tank size — you need a larger tank to hit the same run-time target.

    Precharge accuracy. A bladder tank precharged more than 2 psi below cut-in loses drawdown volume and causes the tank to waterlog over time; precharged above cut-in, the bladder never fully expands and drawdown drops sharply. Precharge should be checked yearly with the tank fully drained of water.

    Pump capacity vs. peak demand. If two fixtures can run simultaneously (a shower plus a washing machine, roughly 5–7 GPM combined), the tank has to cover that peak without the pump cycling more than once per minute — undersized tanks cause pressure to visibly sag when a second fixture opens.

    Tank type. Bladder and diaphragm tanks separate air from water permanently and hold their precharge for years. Older galvanized “captive air” tanks without a bladder lose air into the water over time and need re-charging every few months — a maintenance difference worth knowing before buying.

    How a pressure tank actually works

    Inside a bladder-style pressure tank, a rubber diaphragm splits the vessel into two sides: a sealed air chamber precharged from the factory, and a water chamber connected to the plumbing system. When the pump runs, it pushes water into the tank, compressing the air chamber and raising system pressure. Once pressure reaches the cut-out setting (commonly 50 or 60 psi), a pressure switch stops the pump. As fixtures draw water, the compressed air pushes water back out of the tank, and pressure gradually falls. When it hits the cut-in setting, the switch restarts the pump.

    This cycle is what protects the pump. Without a pressure tank, the pump would start and stop every time a faucet opened and closed — sometimes dozens of times a day — which burns out the motor and the pressure switch contacts far faster than a properly sized tank allows. The tank isn’t a water reserve in any meaningful sense; a 62-gallon pressure tank might deliver only 20 usable gallons before the pump kicks back on. That’s the core distinction from a storage tank, which is built specifically to hold hundreds or thousands of gallons for use during an outage, a dry well, or peak-demand periods.

    A storage tank sitting upstream of the pump doesn’t remove the need for a pressure tank — it just gives the pump a larger, more reliable source to draw from. Many rural and off-grid systems run both: a large storage or cistern tank feeding a booster pump, which then feeds a pressure tank that regulates delivery to the house.

    Common mistakes

    Undersizing to save money. Buying a 20-gallon pressure tank for a full house supply causes rapid short-cycling — the pump starts and stops every few seconds under normal use, which is the single most common cause of premature well pump failure. Size to actual peak GPM demand, not average use.

    Never checking precharge. Tanks lose a few psi of air pressure per year through the fitting threads alone. A tank that reads 28 psi precharge against a 30/50 switch setting will short-cycle even though it was sized correctly when installed. Check precharge annually with a tire-style pressure gauge, tank fully drained.

    Confusing tank volume with usable water. A 44-gallon-rated tank does not deliver 44 gallons before the pump restarts — it delivers whatever fraction the drawdown ratio allows, typically a third to 40% of rated volume. Sizing off total volume instead of drawdown leads to under-capacity systems.

    Skipping the storage tank on unreliable wells. Homes on a low-yield well (under 5 GPM) that rely on a pressure tank alone risk pump damage from the well running dry mid-cycle. A cistern or storage tank between the well and the pressure system buffers against that.

    Related calculators you might need

    Once you know your target pressure range, the next step is usually checking whether your pump can actually deliver it — use the Pump Head Pressure Calculator to work out total dynamic head against elevation and pipe friction. If your system runs off a booster rather than a well pump, the Pump Horsepower & Flow Rate Calculator tells you whether the motor is matched to the load. For homes relying on elevation instead of a pump for part of the system, the Gravity Feed Flow Rate Calculator shows what flow a header tank can supply. And if low pressure at the top floor is the actual complaint, the Minimum Tank Height for Shower Pressure Calculator will tell you how much elevation you’re short.

    Frequently asked questions

    Why does my pressure tank keep cycling on and off? Rapid cycling almost always means either the tank has lost its air precharge (check it with the tank drained) or it’s undersized for your peak demand. A tank should allow at least one minute of continuous run-time per cycle; if the pump is switching every 10–15 seconds, the tank needs recharging or replacing.

    Do I need a pressure tank if I have a storage tank? Yes, unless your storage tank feeds fixtures purely by gravity from a significant height. If a pump draws from the storage tank to pressurize the house, that pump still needs a pressure tank downstream to avoid constant cycling — the storage tank and pressure tank do different jobs.

    What size pressure tank do I need for a well pump? Match the tank’s drawdown to at least one minute of your pump’s rated flow rate. Use the Pump Head Pressure Calculator to confirm your pump’s actual delivery rate first, since altitude and pipe length both reduce it from the nameplate figure.

    How do I know if my pressure tank is waterlogged? Tap the tank — a healthy bladder tank sounds hollow in the top half (air) and solid in the bottom (water). If it sounds solid all the way up, or the pump cycles every few seconds, the air charge has been lost and the tank needs to be drained and re-precharged or replaced.

    Can a pressure tank replace a storage tank in an area with unreliable mains supply? No. A pressure tank typically holds under 20 usable gallons of drawdown — nowhere near enough to bridge a multi-hour supply outage. Areas with intermittent mains water need a storage tank sized to bridge the outage window, with the pressure tank added afterward to regulate delivery.

  • What Is a Float Valve and How Does It Control Tank Filling?

    What Is a Float Valve and How Does It Control Tank Filling?

    A float valve — also called a ball valve, ballcock, or float-operated valve — automatically shuts off water flow into a tank once it reaches a set level, using a floating ball or cup connected by an arm to a valve mechanism. As the water rises, the float rises with it, and at a set height the arm closes the valve, stopping the fill. It’s the same basic mechanism used in a household toilet tank, scaled up for storage and rooftop tanks. This article covers how the mechanism works, sizing considerations, and the most common failure modes.

    The quick answer

    Float valves are sized by the flow rate they need to shut off, not just the tank size — a valve rated for 10 GPM will struggle or fail to seal on a high-pressure supply line delivering 25 GPM, causing it to chatter, leak, or wear out prematurely. Most residential float valves handle 6–20 GPM at supply pressures up to 125 psi, while larger agricultural and rooftop tank float valves scale up to 40+ GPM. Two main types exist: direct-acting float valves, where the float arm directly operates the valve seat, and pilot-operated (diaphragm) float valves, where a small pilot float controls a larger diaphragm valve — used for high-flow or high-pressure applications where a direct-acting arm isn’t strong enough to hold back the water.

    Valve typeTypical flow rangeBest for
    Direct-acting (ball & arm)6–15 GPMSmall to mid-size household tanks
    Pilot-operated diaphragm15–100+ GPMLarge storage, rooftop, and agricultural tanks
    Servo/solenoid-assistedAny, electronically controlledAutomated or remote-monitored systems

    Skip the math: Use the Tank Refill Time Calculator to see how long your tank actually takes to refill once the float valve reopens.

    How the sizing calculation works

    A float valve has to hold back the full static pressure of the supply line while sized correctly to pass the required fill rate without excessive turbulence or chatter at the valve seat. The key relationship is that valve seat size and incoming pressure together determine maximum controllable flow — an undersized valve seat on a high-pressure line creates a jetting effect that erodes the seat and shortens the float valve’s life.

    Worked example: A 2,000-gallon rooftop tank is fed from a supply line at 60 psi, and the owner wants it to refill within 45 minutes when the level drops. Required flow rate = 2,000 gallons ÷ 45 minutes ≈ 44.4 GPM. At 60 psi, that flow rate is beyond what a typical direct-acting float valve (rated to roughly 15 GPM) can reliably shut off without excessive wear, so a pilot-operated diaphragm float valve rated for 50+ GPM at that pressure is the correct choice — a smaller direct-acting valve would either restrict the fill rate well below the 44.4 GPM target or fail early from constant high-pressure strain.

    Key variables that change the answer

    Supply pressure. Higher incoming pressure pushes harder against the valve seat, meaning a valve that seals reliably at 40 psi may leak or chatter at 100 psi even at the identical flow rate — always size against your actual measured supply pressure, not an assumed average.

    Float arm length and buoyancy. A longer float arm provides more mechanical leverage to close the valve fully, which matters more as supply pressure increases; some very high-pressure applications need a pilot-operated design specifically because a direct arm can’t generate enough closing force on its own.

    Water hammer risk. A float valve that closes very quickly against a full-pressure line can create a pressure spike (water hammer) that stresses pipe joints over time — high-flow installations often need a slower-closing or dashpot-damped valve design to avoid this.

    Debris and sediment in the supply. Grit or scale particles in the water can lodge in the valve seat and prevent full closure, which is a common cause of a float valve that appears correctly sized on paper but still drips or overflows in practice.

    The mechanism, in plain language

    In a direct-acting float valve, a hollow ball or cup floats on the water surface, connected by a rigid arm to a lever inside the valve body. As the tank fills, the float rises, and the arm’s rotation gradually closes a small disc or plunger against the valve seat, restricting and finally stopping flow. This is a purely mechanical, self-regulating system — no electricity, no sensor, no controller — which is exactly why it’s been the standard tank-filling mechanism for over a century.

    A pilot-operated float valve works differently: a small, low-flow pilot valve is operated by the float arm exactly like the direct-acting design, but instead of controlling the main flow directly, it controls water pressure on one side of a diaphragm inside a larger main valve. When the pilot closes, pressure builds behind the diaphragm and forces the main valve shut — this lets a small, easily-moved float mechanism control a much larger flow than it could physically hold back on its own, which is why pilot-operated designs scale up to serve large storage and rooftop tanks that a simple arm-and-ball setup couldn’t manage.

    Either design can be set to close at a specific fill level by adjusting the arm length or the float’s position on it, and most designs include an adjustable stop so the shutoff level can be raised or lowered without replacing the whole valve.

    Common mistakes

    Ignoring supply pressure when replacing a valve. Swapping in a like-for-like float valve without checking whether supply pressure changed (a new booster pump, a municipal main upgrade) is the most common cause of a “new” valve chattering or leaking within weeks.

    Setting the float arm too loosely. A float arm that isn’t tight enough on its pivot lets the valve creep open under vibration, causing slow overflows that go unnoticed until the tank’s overflow pipe starts running constantly.

    Skipping periodic seat inspection. Rubber or synthetic valve seats wear and harden over years of contact with mineral-laden water, especially in hard-water areas — a valve that used to seal perfectly can start dripping purely from seat wear, unrelated to the float or arm mechanism.

    Undersizing for peak refill speed after emergency drawdown. A float valve sized only for gradual daily top-up may take far longer than expected to refill a tank drained heavily during a fire event or peak demand — size against your worst-case refill scenario, not just routine daily use.

    Related calculators you might need

    Once you know the float valve’s flow rating, the Tank Refill Time Calculator tells you exactly how long a full refill will take at that rate, which matters if you’re relying on the tank to recover quickly between uses. If you’re specifying a tank for the first time, the Rooftop Tank Size Calculator helps confirm the right capacity before matching a float valve to it. And if refill speed still feels slow after replacing the valve, check the How Long Will My Tank Last Calculator to see whether the real issue is consumption outpacing refill rather than the valve itself.

    Frequently asked questions

    What is a float valve used for on a water tank? It automatically stops water flowing into a tank once it reaches a set level, preventing overflow without any electrical control. It’s the same working principle as a toilet tank fill valve, scaled up for storage or rooftop tank use.

    Why does my float valve keep dripping after it closes? A drip after closure usually means the valve seat has worn or has debris lodged in it, or the float arm has lost its adjustment and isn’t rising high enough to fully seat the valve. Check for sediment first, since it’s the easiest fix.

    What size float valve do I need for my tank? Size against your required refill flow rate at your actual supply pressure, not tank volume alone. Use the Tank Refill Time Calculator to work out what flow rate meets your refill-time target, then match that to a direct-acting or pilot-operated valve rated for it.

    What’s the difference between a float valve and a solenoid valve? A float valve is purely mechanical, operated by water level alone, with no power needed. A solenoid valve is electrically controlled, usually paired with a separate level sensor, and can be integrated into a remote monitoring or automated system — at the cost of needing power and more components that can fail.

  • What Is Water Hardness and How Does It Affect Storage and Pipes?

    What Is Water Hardness and How Does It Affect Storage and Pipes?

    Water hardness measures the dissolved calcium and magnesium in your water, reported as mg/L (or ppm) of calcium carbonate equivalent. The U.S. Geological Survey (USGS) classifies water as soft (0–60 mg/L), moderately hard (61–120), hard (121–180), or very hard (over 180 mg/L). Hardness itself isn’t a health risk — the EPA doesn’t regulate it — but it drives limescale buildup that clogs pipes, coats tank walls, and measurably cuts water heater efficiency over time. This article covers the scale, what causes it, and how much it actually costs you.

    The quick answer

    Test your water’s hardness in mg/L or grains per gallon (1 gpg = 17.1 mg/L) and compare it against the USGS scale below. A landmark 2009 study by the Battelle Memorial Institute, commissioned by the Water Quality Research Foundation, found that every 5 gpg of hardness causes roughly a 4% loss in gas water heater efficiency at moderate usage, rising to as much as 48% efficiency loss at very high hardness (30 gpg).

    Classificationmg/L (CaCO3)Grains per gallonPractical impact
    Soft0–600–3.5Minimal scale risk
    Moderately hard61–1203.5–7Light scale over years
    Hard121–1807–10.5Noticeable scale, reduced heater efficiency
    Very hard180+10.5+Rapid scale buildup, appliance strain

    Skip the math: Use the Water Hardness Calculator to convert your test results between mg/L, ppm, and grains per gallon and get your classification instantly.

    How the calculation works

    Hardness is calculated from lab or test-strip readings of calcium (Ca) and magnesium (Mg) concentration, converted to an equivalent calcium carbonate value using each mineral’s atomic weight ratio to CaCO3: Hardness (mg/L as CaCO3) = 2.5 × Ca(mg/L) + 4.1 × Mg(mg/L).

    Worked example: A well water test shows 40 mg/L calcium and 12 mg/L magnesium. Hardness = (2.5 × 40) + (4.1 × 12) = 100 + 49.2 = 149.2 mg/L as CaCO3, which places the water in the hard classification (121–180 mg/L). Converted to grains per gallon: 149.2 ÷ 17.1 ≈ 8.7 gpg — high enough that scale buildup on a storage tank’s interior walls and on any electric water heater element becomes a realistic maintenance concern within a few years, not decades.

    Key variables that change the answer

    Water temperature. Scale forms fastest in hot water — solubility of calcium carbonate drops sharply above roughly 60°C (140°F), which is exactly why water heaters, not cold storage tanks, take the worst of the buildup even when both are fed by the same hard-water source.

    Source geology. Groundwater moving through limestone, chalk, or dolomite formations picks up far more calcium and magnesium than surface water from a reservoir or rainwater catchment. Well and borehole users in limestone regions routinely see hardness in the hard-to-very-hard range even without any obvious warning signs at the tap.

    Usage volume through the system. A household running 100 gallons of hot water a day sees roughly double the efficiency loss, according to Battelle’s findings, compared to one running 50 gallons a day at the same hardness level — heavier hot-water use accelerates the practical cost of untreated hard water.

    Pipe material. Scale accumulates fastest on rough or corroded interior pipe surfaces, which is why older galvanized steel plumbing scales up faster than smooth-bore copper or PEX carrying the identical water. Over a decade or more, that difference in scaling rate is often the real reason two houses on the same street report very different pressure complaints despite drawing from the same municipal supply.

    Storage tank turnover. A tank that sits mostly full and rarely cycles gives dissolved minerals more time to lose carbon dioxide and settle out on interior surfaces, compared to a tank with regular daily turnover that carries hardness minerals out before they have much chance to crystallize in place.

    The mechanism: how hard water becomes scale

    Calcium and magnesium stay dissolved in cold water under normal pressure, invisible and harmless in solution. Two things push them out of solution and into solid limescale: heat and pressure loss. As water heats up, particularly above 140°F, calcium carbonate’s solubility drops and it precipitates out as a hard, chalky solid — this is why the inside of a kettle or the lower element of an electric water heater scales up long before a cold storage tank ever does.

    The same thing happens more slowly at ambient temperature wherever water sits still or moves slowly enough for dissolved gases to escape — carbon dioxide loss shifts the chemical equilibrium and encourages calcium carbonate to crystallize on tank walls, valve seats, and pipe interiors. Once a thin scale layer forms, it acts as a rough nucleation surface that accelerates further buildup, which is why scale problems tend to get worse at an increasing rate rather than a steady one once they start.

    Inside a storage tank, scale settles preferentially at the bottom (sediment) and on any heating element or hot surface. Inside pipes, it narrows the effective diameter over years, which is the mechanism behind a home’s water pressure quietly dropping over a decade even though nothing was ever visibly “broken.”

    Common mistakes

    Ignoring hardness because water “tastes fine.” Hardness has no meaningful taste or safety signature at the levels that still cause serious scale damage — a water source can be perfectly safe to drink and still be hard enough to cut water heater life significantly. Test, don’t taste.

    Softening only the hot water line. Because scale accelerates dramatically with heat, softening only the water heater feed still leaves cold-water storage tanks, ice makers, and cold fixtures exposed to full hardness — whole-house treatment is usually more cost-effective long-term than a partial fix.

    Descaling on a schedule instead of by test result. Blanket “descale every 6 months” advice ignores that a soft-water household may never need it, while a very-hard-water household may need it twice as often. Base descaling frequency on your actual measured hardness, not a generic interval.

    Mistaking hardness for a safety issue. Hardness is a plumbing and appliance-efficiency problem, not a health regulation — the EPA doesn’t set an enforceable limit because calcium and magnesium aren’t harmful to drink. Don’t confuse hardness testing with a full contaminant test for lead, bacteria, or nitrates, which require separate testing.

    Related calculators you might need

    Hardness is one input into overall water quality — pair it with the TDS Water Calculator to see total dissolved solids, since hardness minerals are usually only part of the TDS figure. If scale has already reduced flow through your system, the Water Filter Flow Rate Calculator shows how much a clogged filter or scaled pipe is actually costing you in delivered flow. And if you’re treating a tank for both hardness and microbial safety, the Water Tank Disinfection Calculator covers the separate chlorine-based step that hardness treatment doesn’t.

    Frequently asked questions

    What is considered hard water? On the USGS scale, water above 121 mg/L (as calcium carbonate) is classified hard, and above 180 mg/L is very hard. In grains per gallon, that’s roughly 7 gpg and up for hard, 10.5 gpg and up for very hard.

    Does hard water damage my water tank? Yes, over time. Hard water precipitates calcium carbonate scale inside storage and pressure tanks, particularly around heating elements and at the sediment layer on the bottom, which reduces effective volume and can shorten tank life. The effect is worse in hot-water storage than cold.

    How do I know if my water is hard without a test kit? Common signs include white crusty deposits around faucets and showerheads, reduced lather from soap, spotty dishes after washing, and a water heater that seems to be losing efficiency faster than its rated lifespan suggests — but a real hardness test with the Water Hardness Calculator gives a specific number rather than a guess.

    Is hard water safe to drink? Yes. The EPA does not regulate hardness as a health contaminant, and the World Health Organization notes calcium and magnesium in drinking water can even contribute modestly to dietary intake. Hardness is a plumbing and appliance-life issue, not a safety one.

    Will a water softener lower my water pressure? A correctly sized softener has minimal impact on pressure during normal flow, though very high-flow moments (multiple fixtures at once) can see a small, usually unnoticeable pressure drop across the resin bed. An undersized softener for your household’s peak demand is the more common cause of any pressure complaint after installation, not the softening process itself.

  • Why Is My Shower Pressure Low Even with a Full Rooftop Tank?

    Why Is My Shower Pressure Low Even with a Full Rooftop Tank?

    Low shower pressure from a full rooftop tank almost always comes down to one of three causes: insufficient tank elevation, undersized pipes, or a blocked aerator or inlet. The tank being full rules out water shortage — the problem is in delivery. Use the minimum tank height for shower pressure calculator to immediately check whether your setup meets the minimum 2.5 PSI threshold (0.17 bar) required for most standard showerheads. This article walks through each cause, how to test for it, and how to fix it.

    The Quick Answer

    Adequate gravity-fed shower pressure requires the base of your tank to sit at least 3 metres (10 feet) above the shower head — this produces approximately 0.3 bar (4.3 PSI), which is the practical lower limit for a comfortable shower. At 2 metres elevation, pressure drops to around 0.2 bar — functional but weak. At 1 metre, it is 0.1 bar — barely a trickle.

    Tank Height Above ShowerApprox. Pressure (bar)Approx. Pressure (PSI)Result
    1 m (3.3 ft)0.101.45Poor — trickle flow
    2 m (6.6 ft)0.202.90Marginal — weak shower
    3 m (9.8 ft)0.294.20Acceptable for basic heads
    5 m (16.4 ft)0.497.10Comfortable — most showerheads
    8 m (26.2 ft)0.7811.3Good — high-flow showerheads

    Skip the math: Use the minimum tank height for shower pressure calculator to find the exact height your setup needs based on your showerhead’s flow rating and pipe run.

    How Water Pressure from a Rooftop Tank Actually Works

    Gravity-fed water systems rely entirely on the vertical distance — the static head — between the water surface in the tank and the point of use. Every metre of elevation generates 0.098 bar (1.42 PSI) of pressure (based on the hydrostatic pressure formula: P = ρgh, where ρ is water density at 1000 kg/m³ and g is 9.81 m/s²).

    Worked example: If your rooftop tank sits on a 1-metre stand on a flat roof 4 metres above ground level, the tank base is 5 metres up. Your shower is at ground floor level, 1 metre above grade — so the effective head is approximately 4 metres. That produces 0.39 bar (5.7 PSI) before friction losses. If your pipes are narrow or long, losses can cut this to 0.2 bar or less at the shower head.

    The water pressure calculator can model this including pipe friction for any pipe material and diameter.

    Diagnosing the Real Cause: Three Tests You Can Do Now

    Test 1 — Measure actual head height. Measure the vertical distance from the bottom of your water tank to the shower head outlet. If it is under 3 metres, insufficient elevation is the primary problem. No amount of pipe work will fix this without also raising the tank or adding a pump.

    Test 2 — Check flow at different points. Turn on a tap near the base of the building and compare its flow to the shower. If the tap flows well but the shower is weak, the problem is specific to the shower branch — likely a long pipe run, narrow pipe diameter, or a blocked showerhead aerator.

    Test 3 — Inspect the outlet pipe diameter. A standard rooftop tank outlet pipe is 25 mm (1 inch) or 32 mm (1.25 inch). If a previous plumber reduced this to 15 mm (0.5 inch) at any point in the run, that restriction alone can halve available flow rate. The pipe size and flow rate calculator shows exactly what flow rate each pipe diameter can deliver at a given pressure.

    Key Variables That Change the Answer

    Tank elevation. This is the dominant factor. Each additional metre of height adds 0.098 bar. If you can raise the tank by 1.5 metres — even on a taller stand — you gain roughly 0.15 bar, which can make the difference between an unusable and a functional shower.

    Pipe diameter. Gravity-fed systems are particularly sensitive to pipe bore. A 15 mm pipe at 3 metres head can deliver around 6–8 litres per minute. A 25 mm pipe at the same head delivers 18–22 L/min. The difference is determined by the Hazen-Williams equation. Most showerheads require a minimum of 8 L/min for satisfactory use.

    Pipe length and bends. Each metre of horizontal pipe introduces friction equivalent to losing about 0.01 bar. Each 90-degree bend adds the equivalent of 0.5–1.5 metres of pipe resistance. A 20-metre pipe run with 6 bends might consume 0.25–0.35 bar before the water even reaches the shower.

    Showerhead type. Low-flow showerheads are rated at 6–8 L/min and work acceptably at 0.2 bar. High-pressure rain-head showerheads may require 0.4–0.6 bar and 12+ L/min to function correctly. If you’ve recently changed to a larger showerhead, that alone can explain a sudden pressure drop.

    Tank outlet fitting. A partially closed valve, corroded ball valve, or an incorrectly sized tank outlet bushing creates a restriction upstream of everything else. This is easy to overlook and check first before undertaking larger plumbing work.

    Common Mistakes

    Installing a booster pump without fixing the pipe. Homeowners often add a pump to compensate for low pressure, only to find it doesn’t help because the outlet pipe running from the tank to the pump inlet is undersized. A pump can only boost what it receives — a 15 mm inlet pipe feeding a pump will still limit flow to 6–8 L/min regardless of pump rating.

    Measuring tank height from the roof surface, not the shower head. The relevant measurement is from the tank base to the shower outlet, not from roof to ground. If the shower is on the first floor, effective head is much lower than assumed. A two-storey building with a ground-floor shower might have 8 metres of effective head. If the shower is on the first floor of the same building, effective head could be as low as 3–4 metres.

    Assuming a full tank means adequate pressure. Volume and pressure are independent variables. A 5,000-litre tank sitting 1.5 metres above a shower head has plenty of water but only 0.15 bar of pressure — insufficient for any standard showerhead. If you are unsure whether your tank is the right size altogether, the rooftop tank size calculator can confirm sizing based on daily household demand.

    Ignoring aerator blockage. Hard water deposits build up inside showerhead aerators and can reduce flow by 40–60% over 12–18 months of use. Before investigating the plumbing system, unscrew the showerhead, soak it in white vinegar for 30 minutes, and retest. This takes 5 minutes and costs nothing.

    Related Calculators You Might Need

    The gravity feed flow rate calculator lets you model the exact flow rate your system will produce at a given head height and pipe diameter — essential before deciding whether to raise the tank or upsize the pipe. If you determine a pump is necessary, the pump head pressure calculator will help you size it correctly against your actual pipe run. For systems with long distribution runs, the water flow rate calculator helps identify where friction losses are occurring. And if your tank height is genuinely the limiting factor, use the water tank weight calculator before raising it on a taller stand — tank stands impose significantly higher point loads on roofs.

    Frequently Asked Questions

    Why does my shower pressure drop when someone uses another tap?

    This is a classic sign of an undersized outlet pipe or a gravity system at the edge of its pressure capacity. When two fixtures draw simultaneously, the available head is split across both. The fix is either to upsize the main distribution pipe or stagger usage. At low gravity pressures (under 0.3 bar), simultaneous use is almost always problematic.

    Can I improve shower pressure without raising my tank?

    Yes, in some cases. Replacing 15 mm pipe runs with 25 mm pipe, eliminating unnecessary bends, and clearing aerators can reclaim 0.1–0.15 bar. Adding an inline shower pump (gravity-assisted pump) is the most reliable fix if head height cannot be changed — pumps rated at 1.5–2.0 bar are available specifically for low-pressure tank systems.

    What is the minimum tank height for a decent shower?

    3 metres of vertical clearance between the tank base and the shower outlet is the practical minimum for a standard showerhead. Below 2 metres, most showerheads produce unsatisfactory flow. Use the minimum tank height for shower pressure calculator to get a figure matched to your specific showerhead and pipe setup.

    Does water pressure change when the tank is nearly empty?

    Yes. As the water level drops, the head decreases. A tank that is 75% full has slightly lower effective pressure than when it is 100% full, depending on tank height. For a 1-metre-deep tank, the difference between full and a quarter full is approximately 0.07 bar — noticeable in a marginal gravity system.

    How do I calculate water pressure from my rooftop tank?

    Multiply the height difference in metres (from tank base to outlet) by 0.098 to get pressure in bar, or by 1.42 to get PSI. This is the static pressure. Subtract friction losses (roughly 0.01 bar per metre of pipe, plus 0.02–0.05 bar per 90-degree elbow) to get working pressure at the showerhead.
  • My Water Tank Pressure Is Low — Is It the Tank Height or the Pipe?

    My Water Tank Pressure Is Low — Is It the Tank Height or the Pipe?

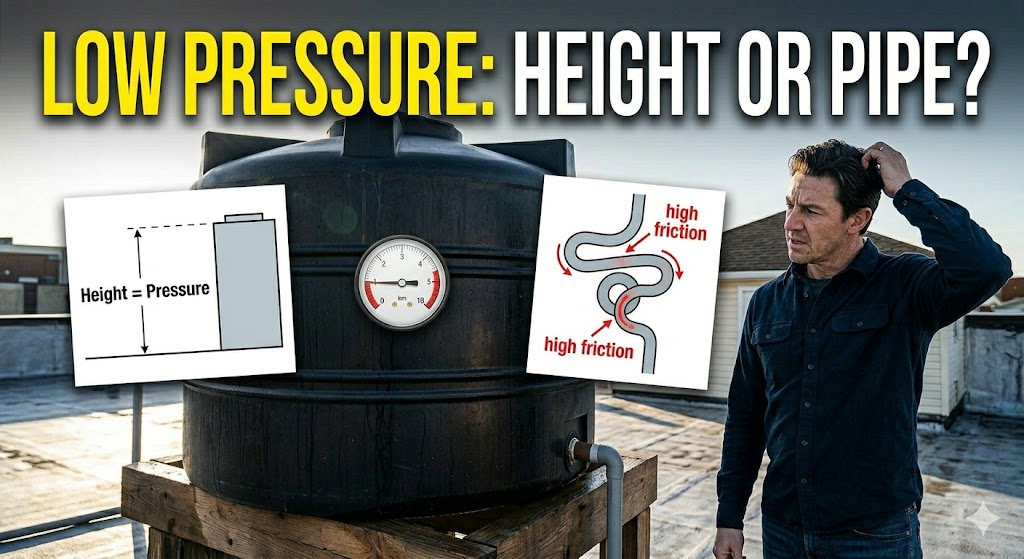
    Low water pressure from a gravity-fed rooftop tank is caused by either insufficient tank elevation, undersized or blocked pipes, or a combination of both. The fastest way to isolate the cause: open the outlet valve directly at the tank base. If flow is strong there but weak at the tap, the pipe is the problem. If flow is weak at the tank outlet itself, the tank height is insufficient. Use the water pressure calculator to model your system and identify the limiting factor before spending money on fixes.

    The Quick Answer

    Every metre of height between your tank base and the outlet point generates 0.098 bar (1.42 PSI) of static pressure. Pipe friction then reduces this. The formula is:

    Working pressure = (Head in metres × 0.098) − Friction losses (bar)

    Head HeightStatic PressureAfter 15m of 20mm pipeAfter 15m of 25mm pipe
    2 m0.20 bar (2.9 PSI)~0.08 bar~0.14 bar
    3 m0.29 bar (4.2 PSI)~0.17 bar~0.23 bar
    5 m0.49 bar (7.1 PSI)~0.37 bar~0.43 bar
    8 m0.78 bar (11.3 PSI)~0.66 bar~0.72 bar

    Skip the math: Use the gravity feed flow rate calculator to model your specific pipe run and head height.

    How to Isolate the Cause in 10 Minutes

    Step 1: Test at the tank outlet. Close all taps in the house. Open the outlet valve or union joint directly at the tank’s exit point. Time how long it takes to fill a 10-litre bucket. If it fills in under 60 seconds (>10 L/min), the tank elevation is adequate and the problem is downstream. If it takes more than 90 seconds, the head height itself is insufficient.

    Step 2: Test at intermediate points. If you can access the pipe at a midpoint — for example, where it enters the house at roof level — repeat the bucket test. A significant drop between tank outlet and mid-run confirms pipe friction or a restriction (a partially closed valve, a corroded joint, or a diameter reduction) within that section.

    Step 3: Check for diameter reductions. Trace your pipe run from tank to outlets. Look for any point where 25 mm pipe connects to 15 mm pipe. Even a short 1-metre run of 15 mm pipe acts as a bottleneck for the entire system. The pipe size and flow rate calculator quantifies exactly how much a given pipe diameter restricts flow at your available pressure.

    Is It the Tank Height?

    If your outlet flow is weak (under 8 L/min at the tank exit), the tank elevation is the primary constraint. The minimum practical head for household use is 3 metres above the highest outlet point — typically the showerhead or a first-floor tap. For a single-storey home with the tank on a roof stand, 3–5 metres of effective head is achievable. For a two-storey home, a ground-floor tank is not viable for gravity feed — the tank must be elevated above the roof.

    Solutions for insufficient head: raise the tank on a taller stand (check roof loading with the rooftop load bearing calculator first), install a gravity-assisted booster pump (typically 1.0–2.0 bar boost), or fit a pressurisation unit that draws from the tank and pressurises the household supply to 2.0–3.0 bar.

    Use the minimum tank height for shower pressure calculator to determine the exact height needed for your specific fixtures.

    Is It the Pipe?

    If tank outlet flow is adequate but pressure at taps is low, the pipe network is the problem. Three sub-causes are most common:

    Undersized pipe diameter. The Hazen-Williams equation governs gravity flow: Q = 0.2785 × C × D^2.63 × S^0.54, where Q is flow rate (m³/s), C is pipe roughness (typically 130–150 for PVC), D is internal diameter (m), and S is hydraulic gradient (head loss per unit length). In practice: a 15 mm pipe at 3 metres head delivers around 6 L/min. A 25 mm pipe at the same head delivers approximately 20 L/min. Upgrading from 15 mm to 25 mm throughout your distribution run typically triples available flow.

    Pipe corrosion or scale. Galvanised steel pipes narrow progressively as scale builds inside them. A 25 mm pipe with 4 mm of scale has an effective internal diameter of 17 mm — nearly a 50% reduction in cross-section. Old steel systems in hard-water areas (above 200 mg/L calcium carbonate) can lose significant capacity within 10 years.

    Excessive bends and fittings. Each 90-degree elbow adds the equivalent of 0.5–1.5 metres of straight pipe to the friction calculation. A pipe run with 8 elbows effectively becomes 4–12 metres longer for pressure calculation purposes. Minimise bends and use 45-degree elbows instead of 90-degree where layout allows.

    Common Mistakes

    Installing a pump before diagnosing the actual bottleneck. A pump added before a pipe restriction is bypassed by the restriction. If the pipe from the pump to the house is 15 mm, the pump output is capped by the pipe, not by its rated capacity. Always fix any pipe restrictions before sizing a pump — or the pump will be undersized and underperforming from day one.

    Measuring tank height from the ground, not from the highest outlet. Effective head is the vertical distance from the tank base to the highest point of use — typically the showerhead or a tap on an upper floor — not from the tank to ground level. A tank on a roof 6 metres above ground, serving a first-floor shower at 3.5 metres height, has only 2.5 metres of effective head.

    Assuming new pipes are always the right size. During renovations, plumbers sometimes connect new pipework to existing runs without checking whether the existing bore is adequate. A newly renovated bathroom may have fresh copper or CPVC pipe, but if it connects to a 40-year-old 15 mm galvanised branch, the old section dictates the flow limit.

    Ignoring partially closed valves. A ball valve that is 70% open instead of fully open introduces significant restriction — equivalent to reducing pipe diameter by 15–20%. Check all inline valves are fully open before investigating pipe size or tank height.

    Related Calculators You Might Need

    Start with the water pressure calculator to get a complete model of your system based on head height, pipe diameter, and run length. If you’ve determined the tank needs to be higher, the pump head pressure calculator will help size a booster pump if raising the tank is not feasible. The tank refill time calculator is useful if low incoming flow rate — rather than distribution pressure — is the underlying issue. And for situations where multiple outlets are competing for pressure simultaneously, the water flow rate calculator shows how flow splits under simultaneous demand.

    Frequently Asked Questions

    How do I increase water pressure from a gravity tank without a pump?

    Raise the tank height (every additional metre adds 0.098 bar), replace undersized pipe sections with larger bore pipe, eliminate unnecessary bends, and ensure all valves are fully open. Together, these changes can reclaim 0.15–0.25 bar in a typical gravity system — meaningful if you’re starting from a marginal position of 0.2–0.3 bar.

    What is normal water pressure from a rooftop tank?

    In practice, gravity-fed rooftop systems in South Asia and Africa typically deliver 0.2–0.5 bar at fixtures — well below the 1.0–3.5 bar common in mains-pressurised systems. Most basic showerheads need at least 0.2 bar to function. Thermostatic shower valves and rain-head showerheads typically require 0.4–0.8 bar.

    How much does pipe size affect gravity water pressure?

    Pipe diameter does not change static pressure — only head height does that. But pipe diameter dramatically affects flow rate at a given pressure. A 15 mm pipe limits flow so severely that even adequate static pressure (0.3 bar) produces only a trickle. Pressure at the fixture drops because flow-limiting creates friction. Upgrading pipe diameter is the single most cost-effective improvement for low-flow gravity systems.

    My water pressure is fine downstairs but weak upstairs — what does that mean?

    Each floor of height (approximately 3 metres) reduces gravity pressure by 0.3 bar. If ground-floor pressure is 0.4 bar, first-floor pressure will be approximately 0.1 bar — barely functional for most fixtures. This is a head height problem, not a pipe problem. The only solutions are raising the tank, fitting an upper-floor booster pump, or installing a pressurisation unit.

    Can I add a pressure booster pump to a gravity-fed tank system?

    Yes — gravity-assisted booster pumps are specifically designed for low-pressure tank systems. They activate on demand and boost pressure to 1.5–3.0 bar. Size the pump based on your peak flow demand (typically 15–20 L/min for a family home) and the suction head available from the tank. Use the pump head pressure calculator to match pump specifications to your system.

  • How to Tell If Your Water Tank Is the Wrong Size for Your Home

    How to Tell If Your Water Tank Is the Wrong Size for Your Home

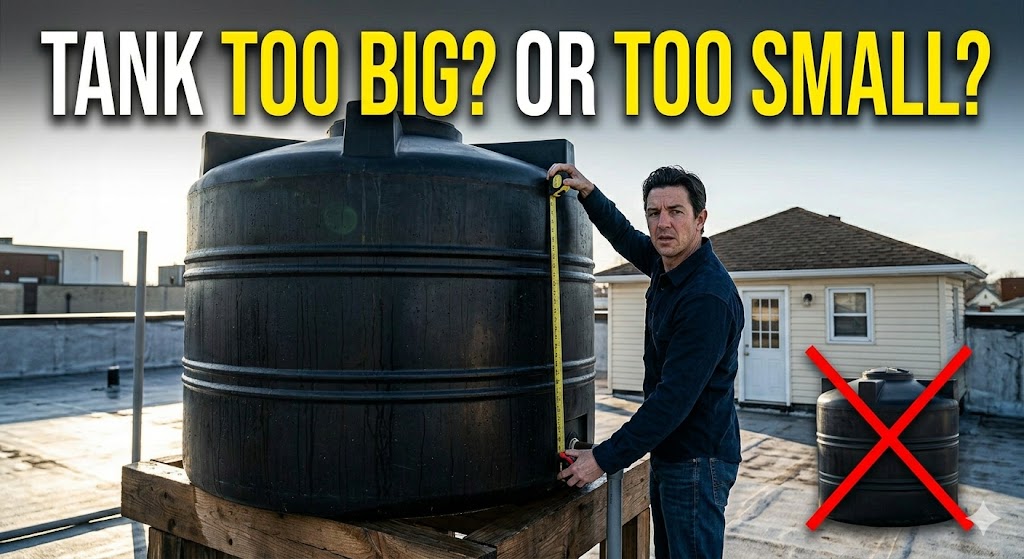
    The clearest sign of an undersized tank is running out of water before supply resumes — but by then, the problem is obvious. Subtler signs include low pressure during peak morning usage, frequent pump cycling, and always having less than 20% capacity remaining before refill. An oversized tank is less obvious but equally problematic: water sitting unused for more than 48–72 hours degrades in quality and becomes a bacterial risk. Use the water tank size for home calculator to find the right size based on your household’s actual daily demand and supply schedule.

    The Quick Answer

    A correctly sized residential water tank should provide 1.5–2 days of household demand as a buffer, assuming daily or every-other-day supply. For households with unreliable supply — 2–3 days per week — the tank should cover 4–5 days of demand. WHO’s basic water requirement is 50 litres per person per day; comfortable urban usage in South Asia typically runs 100–150 L/person/day.

    Household SizeDaily Usage (100 L/p/d)2-Day Buffer5-Day Buffer (Unreliable Supply)
    2 people200 L400 L1,000 L
    4 people400 L800 L2,000 L
    6 people600 L1,200 L3,000 L
    8 people800 L1,600 L4,000 L

    Skip the math: Use the water tank size for home calculator to get a recommended size based on your household, supply frequency, and climate.

    How to Calculate the Right Tank Size

    The formula is: Tank capacity = Daily demand (litres) × Buffer days × Safety factor (1.1–1.2)

    Worked example: A family of 5 in Lahore uses approximately 120 litres per person per day (bathing, cooking, toilet flushing, cleaning). Daily demand = 600 L. Municipal supply arrives every 2 days. Buffer required = 2 days. Tank size = 600 × 2 × 1.15 = 1,380 litres. A 1,500-litre tank is the appropriate choice — the next standard size up from 1,380 L.

    The 1.1–1.2 safety factor accounts for seasonal demand spikes (summer usage is typically 20–30% higher), tank dead volume (the last 5–10% of water is often unusable due to sediment or outlet position), and delivery variability.

    Signs Your Tank Is the Wrong Size

    Undersized tank — what to look for:

    The pump runs more than 4–5 times per day in a household that refills from a borehole or sump. The tank drops below 20% capacity before the next supply arrives more than once a week. There is noticeable pressure drop during morning peak usage (6–9 AM). Family members regularly report running out of hot water or water pressure mid-shower.

    Oversized tank — what to look for:

    Water sits in the tank for more than 72 hours before being used. The tank never drops below 60–70% capacity even during peak periods. There is a recurring musty or stale smell from stored water despite regular cleaning. The tank occupies significant roof space and structural load capacity that could be used more efficiently.

    An oversized tank is not just wasteful — it is a water quality risk. The how long will my tank last calculator shows daily usage against tank volume, making it easy to spot whether your turnover rate is healthy.

    Key Variables That Change the Correct Size

    Supply reliability. This is the dominant factor. A household on continuous mains supply needs only a small header tank or pressure vessel. A household receiving supply every 3 days needs a tank sized for 3+ days of demand. Track your actual supply pattern over one month to get a reliable figure — supply schedules are often less reliable than utilities advertise.

    Climate and season. Households in hot climates use 20–40% more water in summer than winter, primarily through increased bathing frequency and evaporative cooling. Size your tank for peak-season demand, not average.

    Household type. A family that includes a clothes-washing machine uses 40–80 litres per wash cycle. A garden or livestock adds further irregular demand. The daily water requirement calculator accounts for these use patterns individually.

    Backup supply. If you have a borehole, rainwater harvesting, or tanker delivery as a backup, your storage tank can be sized more conservatively — perhaps 2–3 days of demand rather than 5. If the tank is the only source, err toward the upper end of the range.

    Common Mistakes

    Sizing based on the number of bedrooms, not actual occupancy. Tank sizing guides in South Asia often use bedroom count as a proxy — 1,000 litres per bedroom is a common rule of thumb. This fails for properties with large families in few rooms, or small families in large homes. Always size on actual number of occupants and their usage patterns.

    Not accounting for water lost to overflow. A tank without a working float valve or an improperly set one fills to overflow whenever supply arrives. This wastes water and masks the fact that the tank might actually be adequate — it’s just losing water before it can be used. Check the float valve annually.

    Buying the largest tank that fits the space. Bigger is not safer if it compromises water quality through slow turnover, or overloads the roof structure. Use the rooftop load bearing calculator to check structural limits before choosing tank volume.

    Ignoring the dead volume. Most cylindrical or round-base tanks have an outlet pipe positioned 5–10 cm above the tank floor. This means the last 50–150 litres are unreachable without tilting the tank. Factor this into effective usable capacity when comparing tank sizes.

    Related Calculators You Might Need

    Once you’ve confirmed the right tank size, check whether your roof can actually support it with the rooftop load bearing calculator. If you’re also managing water quality in relation to storage duration, the safe water storage duration calculator will confirm whether your tank’s turnover rate is within safe limits. For apartment-dwellers or multi-unit buildings where tank sizing is more complex, the apartment water tank size calculator handles shared-supply scenarios. And if you’re trying to understand how long your current tank will last under your actual daily demand, the how long will my tank last calculator gives a direct answer.

    Frequently Asked Questions

    How do I know if my water tank is big enough for my family?

    Calculate your daily usage (typically 80–150 litres per person per day in urban South Asia), multiply by the number of days between supply deliveries, and add a 15% buffer. If your current tank is smaller than this figure, it’s undersized. If it’s more than double this figure, it may be creating a water quality risk from slow turnover.

    What happens if my water tank is too small?

    You run out of stored water before the next supply arrives, leading to disrupted daily routines. In households dependent on gravity feed, low water levels also mean declining pressure toward the end of the tank’s cycle — showers weaken noticeably when the tank drops below 30% full.

    Is it bad to have a water tank that is too large?

    Yes. Water sitting in a tank for more than 48–72 hours in warm conditions loses its residual chlorine and becomes susceptible to bacterial growth. An oversized tank that is never fully depleted has a constantly ageing water inventory in the lower section. This is a genuine health concern, not just an efficiency issue.

    How many litres per person per day should I plan for?

    WHO’s basic requirement for survival is 15–20 L/person/day. Comfortable domestic use with flushing toilets, washing machine, and daily bathing is 100–150 L/person/day in urban South Asia, the Middle East, and Africa. Higher-income households with gardens can reach 200–300 L/person/day.

    Should I get one large tank or two smaller tanks?

    Two tanks offer redundancy — one can be cleaned while the other remains in service — and better roof load distribution. The downside is added installation cost and two sets of fittings to maintain. For most homes, a single correctly sized tank is simpler and adequate. Two tanks are worth the cost for households with no alternative water source.

  • Why Does My Water Taste or Smell Bad After Storage?

    Why Does My Water Taste or Smell Bad After Storage?

    Bad taste or smell in stored water is almost always caused by one of three things: bacterial growth, chlorine dissipation, or contamination from the tank itself. Municipal water typically contains 0.2–0.5 mg/L of residual chlorine at the tap — enough to suppress bacterial growth for 24–48 hours in a clean container. In a large, poorly sealed, or infrequently cleaned rooftop tank, that chlorine is gone within hours, leaving the water unprotected. Use the safe water storage duration calculator to find out how long your tank water is actually safe to use.

    The Quick Answer

    Water stored in a tank begins to degrade in quality once residual disinfectant is depleted. Under typical conditions — 25–35°C ambient, a partially sealed tank — this takes 12–48 hours for municipal supply. Groundwater with no initial chlorine degrades faster. The key factors are temperature (bacterial doubling time is 20 minutes at 37°C), light exposure, and tank cleanliness.

    SymptomMost Likely CauseTest to Confirm
    Earthy or musty smellAlgae or bacterial biofilmInspect tank interior for green/black deposits
    Rotten egg / sulphur smellHydrogen sulphide from anaerobic bacteriaH2S test strip or lab sample
    Chlorine smell (strong)Over-dosing during cleaningChlorine test strip — above 5 mg/L is excessive
    Plastic or chemical tasteTank material leachingCheck tank age, UV damage, food-grade certification
    Metallic tasteCorroded pipes or steel tankpH and TDS test; inspect pipe interiors
    Flat or stale tasteChlorine dissipated; low dissolved oxygenResidual chlorine test — target 0.2–0.5 mg/L

    Skip the math: Use the chlorine dosage calculator to determine exactly how much chlorine to add to your tank to restore safe residual levels without over-treating.

    How Water Degrades in Storage

    When chlorinated municipal water enters a storage tank, residual chlorine begins breaking down through contact with organic matter, UV light, heat, and the tank surface area. The rate is governed by the first-order decay equation: Ct = C0 × e^(-k×t), where C0 is initial chlorine concentration, k is the decay constant (typically 0.01–0.1 per hour depending on temperature and contamination), and t is time in hours.

    At 30°C in a moderately contaminated tank, residual chlorine can drop from 0.5 mg/L to below 0.1 mg/L (the WHO minimum) in under 6 hours. Once residual chlorine is gone, any bacteria present double approximately every 20 minutes at body temperature — a colony of 100 bacteria can become 100,000 in under 2.5 hours under ideal conditions.

    Algae require light. An uncovered or translucent tank exposed to sunlight will develop algal growth within days during warm weather. Algae themselves are not typically harmful at low counts, but they produce earthy, musty compounds (geosmin and 2-methylisoborneol) that are detectable by humans at concentrations as low as 5 nanograms per litre.

    Diagnosing Your Specific Problem

    Cause 1: Bacterial biofilm (musty, earthy, or faecal smell). Open your tank (safely, with a torch) and inspect the interior walls. A healthy tank has no visible deposits. Visible slime, dark patches, or a slimy film on the inlet pipe or walls confirms biofilm. The fix is a full tank disinfection using the water tank disinfection calculator to determine the right dose. WHO guidelines recommend 50 mg/L of free chlorine for contact disinfection of tanks, with a 30-minute contact time.

    Cause 2: Hydrogen sulphide (rotten egg smell). This occurs when sulphate-reducing bacteria colonise the tank under anaerobic (oxygen-poor) conditions — typically in large, stagnant tanks where the bottom water is rarely turned over. The sulphur smell is unmistakable. H2S is not harmful at trace concentrations but indicates serious bacterial contamination. Resolution requires complete draining, scrubbing with a 200 mg/L chlorine solution, and improved tank turnover — ideally, the tank should be emptied and refilled within 48 hours under normal usage.

    Cause 3: Tank material leaching (plastic or chemical taste). Polyethylene tanks certified to NSF/ANSI 61 or equivalent (IS 12701 in India) should not leach chemicals into water at normal temperatures. Tanks that are UV-degraded (surface becomes chalky or brittle) or older than 15–20 years may develop micro-fissures that harbour bacteria and alter taste. High-density polyethylene (HDPE) food-grade tanks are safe; recycled or uncertified plastic tanks are not.

    Key Variables That Change the Answer

    Temperature. Bacterial growth rate roughly doubles with every 10°C rise in temperature. A tank in a hot climate (35–40°C ambient, 45°C on direct sun) provides ideal conditions for rapid bacterial growth. In temperate climates, the same tank will remain acceptable for significantly longer.

    Tank coverage and sealing. An open or poorly sealed tank is continuously exposed to airborne contamination, insects, and bird droppings. Each exposure introduces additional bacteria and organic matter that accelerates chlorine consumption. A properly sealed tank with a tight-fitting lid and inlet mesh reduces contamination load significantly.

    Initial water quality. Groundwater from a borehole or well has no residual chlorine and typically carries higher bacterial and mineral loads than treated municipal supply. Stored borehole water without treatment will degrade to unsafe quality within 6–12 hours at 30°C. The TDS water calculator can help assess your source water quality.

    Tank cleaning frequency. WHO recommends cleaning rooftop tanks every 6 months. In practice, most household tanks in South Asia and Africa are cleaned once a year or less — often never. A 2-year-old uncleaned tank will have a substantial biofilm layer that provides both a bacterial reservoir and a chlorine sink.

    Pipe material. Old galvanised steel pipes add iron and zinc to stored water, producing a metallic taste and elevated TDS. Copper pipes contribute a slight metallic taste in soft water. PVC and CPVC pipes are neutral for taste if food-grade certified.

    Common Mistakes

    Adding too much chlorine when cleaning. A common belief is that more chlorine means safer water. Above 5 mg/L of free residual chlorine, water tastes strongly chemical and may produce disinfection byproducts (trihalomethanes) at elevated levels. The bleach to water ratio calculator helps determine the correct dilution from household bleach. After tank disinfection, the tank must be flushed thoroughly before returning to use.

    Cleaning the tank without addressing the root cause. Cleaning removes biofilm but does not prevent it returning. If the tank inlet is not screened, the lid is not sealed, or turnover time is over 72 hours, biofilm will re-establish within weeks. Fix the conditions, not just the symptom.

    Assuming cold water is always safe. Water from an underground cistern may remain below 15°C — too cold for rapid bacterial growth. However, it can still harbour Legionella species, which thrive at 25–45°C when the water warms during distribution through hot pipes. Legionella risk is primarily a concern in institutional, commercial, or large residential systems with long pipe runs.

    Not testing before assuming the problem is bacterial. A metallic taste is not bacteria. A chemical smell from new pipes is not bacteria. Treating with chlorine for a problem caused by pipe corrosion or material off-gassing will not resolve it. Use a basic water test kit (available for $5–15) to check TDS, pH, hardness, and chlorine residual before treating. The water hardness calculator and water pH adjustment calculator can help diagnose mineral-based taste issues.

    Related Calculators You Might Need

    If you’ve confirmed bacterial contamination, the chlorine dosage calculator is the fastest route to a treatment dose based on your tank volume. For large tanks where you need to establish an ongoing maintenance schedule, the safe water storage duration calculator will tell you how frequently your tank should be cycled or retreated under your local temperature conditions. If you’re considering UV disinfection as a longer-term solution, the UV disinfection tank calculator helps size the right system. And if your taste problem turns out to be hardness or mineral-based rather than bacterial, start with the water hardness calculator.

    Frequently Asked Questions

    How often should I clean my water storage tank?

    WHO recommends every 6 months for household tanks. In climates above 30°C with hard water or significant sediment, quarterly cleaning is better practice. Commercial and institutional tanks should be cleaned and tested every 3 months. The 6-month cycle is a minimum, not an optimal schedule.

    Is it safe to drink water that smells slightly of chlorine?

    Yes, if the chlorine smell is faint (0.2–0.5 mg/L range). WHO’s guideline value for residual chlorine is 5 mg/L as a health limit, though taste becomes objectionable at 0.6–0.8 mg/L for most people. If the smell is very strong, the concentration is likely above 2 mg/L — allow the water to stand uncovered for 30 minutes or use a carbon filter.

    Why does my water smell fine from the tap but bad from the tank?

    The tank environment — heat, low turnover, biofilm surface area — accelerates chlorine decay and bacterial growth that doesn’t occur in pressurised mains pipes. The water is the same at both points, but the tank changes it. This almost always means the tank needs cleaning and the chlorine residual needs restoration.

    Can algae in a water tank make you sick?

    Common green algae at low concentrations are not directly harmful, but they create an earthy taste and indicate an unsealed or light-exposed tank. More concerning are cyanobacteria (blue-green algae), which produce toxins at higher concentrations. If the water turns green or blue-green, do not use it for drinking and disinfect the tank immediately.

    What does a sulphur smell in tank water mean?

    Hydrogen sulphide gas, produced by anaerobic sulphate-reducing bacteria colonising sediment at the bottom of the tank. It means the tank is severely contaminated and the water is not safe for drinking. The tank needs to be drained, scrubbed, and disinfected with a 200 mg/L chlorine solution before returning to service.

  • Will My Roof Hold a Full Water Tank? (And How to Check)

    Will My Roof Hold a Full Water Tank? (And How to Check)

    A 1,000-litre water tank full of water weighs approximately 1,050 kg — over a tonne, before accounting for the tank’s own weight. Whether your roof slab can hold that load depends on its construction type, age, reinforcement, and span. Most flat reinforced concrete roofs in South Asia and the Middle East are engineered for 150–300 kg/m², which can accommodate a properly positioned rooftop tank — but not always a large one, and not always where people assume. Use the rooftop load bearing calculator to check your slab’s capacity before buying.

    The Quick Answer

    The safe distributed load capacity for a reinforced concrete roof slab in residential construction is typically 150–200 kg/m² for older slabs (pre-1980) and 200–300 kg/m² for modern construction following IS 456, ACI 318, or equivalent codes. A rooftop tank must not exceed this limit when its weight is spread over the contact area — or, if placed on legs, when the point load from each leg is calculated separately.

    Tank SizeFull Weight (water + tank)Min. Safe Footprint at 200 kg/m²Min. Safe Footprint at 150 kg/m²
    500 L~540 kg2.7 m²3.6 m²
    1,000 L~1,080 kg5.4 m²7.2 m²
    2,000 L~2,100 kg10.5 m²14.0 m²
    5,000 L~5,150 kg25.8 m²34.3 m²

    Skip the math: Use the rooftop load bearing calculator to input your slab dimensions, construction year, and tank specifications for a precise assessment.

    How Rooftop Load Capacity Is Calculated

    A slab’s safe load capacity is expressed as a uniform distributed load (UDL) in kg/m² or kN/m². The key formula for checking a rooftop tank installation is:

    Pressure (kg/m²) = Total weight of tank + water / Contact area of tank base (m²)

    Worked example: A 2,000-litre polyethylene tank weighs approximately 80 kg empty. Full, it contains 2,000 kg of water. Total: 2,080 kg. If the tank base is 1.8 m × 1.8 m (3.24 m²), the distributed load is 2,080 ÷ 3.24 = 642 kg/m². This exceeds safe limits for virtually all residential roofs without structural reinforcement.

    A 2,000-litre tank on a base frame that spreads the load across 6 m² reduces the demand to 347 kg/m² — still high for most residential slabs. This is why large tanks typically require structural assessment.

    For tanks on legs or stands, point loads apply instead of distributed loads. Each leg transmits the full tank weight divided by the number of legs — typically 3 or 4. A 1,000 kg load on 4 legs = 250 kg per leg point. The slab must be assessed for punching shear at each contact point, not just overall distributed capacity.

    How to Check Your Roof’s Capacity

    Step 1: Identify your slab type. Flat reinforced concrete (RCC) is most common in South Asia, the Middle East, and Africa. In the UK and Australia, pitched timber roofs cannot support rooftop tanks without structural modification — only flat concrete or steel-framed roofs should be considered.

    Step 2: Find your structural drawings or contact the original builder. If your building was constructed with approved drawings, the slab design live load is stated. Residential slabs in India are typically designed for 1.5–2.0 kN/m² (153–204 kg/m²) live load per IS 875 Part 2. In the US, IBC requires 1.44 kN/m² (147 kg/m²) minimum for flat roofs.

    Step 3: Check placement relative to load-bearing walls or beams. A slab is strongest directly over a beam or wall. Placing a heavy tank in the centre of a large unsupported span significantly increases deflection and punching shear risk. Position tanks above or near structural supports wherever possible.

    Step 4: Commission a structural engineer’s assessment for tanks over 500 litres. This is not optional in most jurisdictions for tanks exceeding 1,000 litres. An assessment costs $150–400 in the US/UK and ₹3,000–10,000 in India — far less than the cost of slab failure.

    Key Variables That Change the Answer

    Slab age and condition. A 30-year-old RCC slab may have experienced carbonation of the concrete cover, reducing rebar bond. Slabs with visible cracking, efflorescence, or spalling should be assessed before adding any significant load.

    Slab thickness. A 100 mm slab carries substantially less load than a 150 mm slab. Most residential RCC roofs in South Asia are 100–125 mm. In the Gulf region, 200 mm is common for larger villas.

    Span length. A slab spanning 3 metres between supports carries twice the bending moment of one spanning 2 metres for the same load. Point loads from tank stands on long spans are particularly risky.

    Tank shape and base configuration. A round tank with a small base area concentrates load more than a rectangular tank with the same volume. A tank on a flat base distributes load better than one on a stand with 4 point legs.

    Number of tanks. Multiple tanks placed close together produce overlapping load zones in the slab. Two 1,000-litre tanks 1 metre apart can produce higher slab stresses than one 2,000-litre tank because the load zones interact.

    Common Mistakes

    Placing the tank in the middle of the largest roof span. This is structurally the worst position. Midspan placement maximises bending moment in the slab and can cause progressive deflection over years. Tanks should always be positioned as close as possible to load-bearing walls or beams.

    Using a tank stand that reduces the contact area. A homeowner replaces a flat-base 1,000-litre tank with a raised version on 4 legs to improve gravity pressure. The load per leg is now 262 kg — on a small contact pad of perhaps 0.01 m² per leg, this is 26,000 kg/m², which is a punching load, not a distributed one. The slab must be checked for punching shear at each pad location.

    Assuming the roof can hold the same load it held before. A roof that successfully held a 500-litre tank for 10 years does not automatically indicate capacity for a 2,000-litre upgrade. The relationship between load and slab stress is non-linear beyond a certain point. Always recalculate. Use the safe rooftop tank load calculator when upgrading tank size.

    Ignoring the weight of the stand itself. A galvanised steel tank stand for a 2,000-litre tank can weigh 80–150 kg. Add this to the full tank weight before comparing against slab capacity.

    Related Calculators You Might Need

    Before finalising your tank size, run your numbers through the water tank weight calculator to get the total mass including tank material weight. If you’re working out where to place the tank based on pressure requirements as well, the minimum tank height for shower pressure calculator will tell you the minimum elevation needed for adequate flow. For large commercial or institutional installations, the tank weight per square foot calculator translates total tank weight into the distributed load figure your structural engineer will want to compare against the slab design spec.

    Frequently Asked Questions

    How much does a full 1,000-litre water tank weigh?

    A full 1,000-litre polyethylene tank weighs approximately 1,040–1,080 kg, depending on the tank’s own weight (typically 40–80 kg). Steel tanks of the same capacity weigh 1,100–1,200 kg full. Use the water tank weight calculator to get an exact figure for your tank model.

    Do I need a structural engineer to install a rooftop tank?

    For tanks under 500 litres on modern reinforced concrete roofs, a structural assessment is usually not legally required — though still advisable. For tanks 1,000 litres and above, most building codes in India, Pakistan, the UAE, and Australia require a certified structural check before installation. In the UK, any structural alteration requires building control notification.

    Will my roof hold a full water tank on a raised stand?

    Possibly — but a stand introduces point loads rather than distributed loads, which the slab must resist through punching shear. This is a different structural calculation from overall distributed capacity. A roof rated at 200 kg/m² may still fail at a stand leg if the contact pad is too small. Always check point load capacity separately.

    What is the safest tank size for a standard residential roof?

    For a modern RCC flat roof (125 mm thick, 3 m span) rated at 200 kg/m², a 500-litre tank on a flat base distributing load over 1.5 m² imposes around 360 kg/m² — marginally acceptable near supports. A 1,000-litre tank is typically the practical limit for residential rooftop placement without structural reinforcement.

    What happens if the roof can’t take the tank weight?

    Progressive slab deflection occurs first — the roof develops a slight bow, which you may notice as sloping standing water after rain. Over time, cracking appears, followed by rebar corrosion and spalling. In severe cases, partial slab collapse can occur without warning. This process can take 2–15 years depending on load magnitude and slab condition.

  • My Water Runs Out in 2 Days — How Big a Tank Do I Really Need?

    My Water Runs Out in 2 Days — How Big a Tank Do I Really Need?

    If your tank empties every two days, you have a storage problem, not necessarily a supply problem. The correct tank size is determined by three numbers: your daily household consumption, the number of days of backup you want, and whether your refill rate can realistically replenish the tank in the supply window you have. Use the water tank size for home calculator to get a precise answer for your household — the rest of this article explains how those inputs work and where people go wrong.

    A tank that empties in two days with a 4-person household means consumption is roughly 150–250 litres per person per day, which is typical for households with showers, a washing machine, and regular cooking. That puts total daily demand at 600–1,000 litres. A single 1,000-litre tank will last exactly one to two days under those conditions, which is exactly the problem being described. The solution is almost always a larger tank, a reduction in consumption, or both.

    How to calculate the tank size you actually need

    The formula is straightforward: Tank size = daily consumption × backup days + 10–15% buffer. The difficulty is accurately establishing daily consumption, because underestimating it is the single most common reason people buy tanks that are too small.

    Start with the daily water requirement calculator to estimate your household’s demand by entering the number of people and the activities they perform. Alternatively, read your water meter at 24-hour intervals for 3–5 days and average the readings — this gives you actual consumption, which is more accurate than any estimate.

    Backup duration is a separate decision from consumption. 1–2 days is appropriate where mains supply is reliable but you want short-term protection from outages. 3–5 days is standard for areas with intermittent supply. 7–14 days is appropriate for rural properties on borehole or rainwater, or for households that want genuine supply independence. Emergency planners often target 30 days of critical water (drinking and sanitation only, approximately 20 litres per person per day) as a separate emergency reserve, not the household operating tank.

    Household sizeDaily use (moderate)2-day tank5-day tank7-day tank
    2 people300 L700 L1,650 L2,300 L
    4 people600 L1,400 L3,300 L4,600 L
    6 people900 L2,000 L5,000 L7,000 L
    8 people1,200 L2,700 L6,600 L9,300 L

    (Figures include a 15% buffer. Based on 150 L per person per day — moderate use with shower, cooking, toilet flushing. High-use households should add 30–50%.)

    Why tank size is only half the answer

    A larger tank only solves the problem if it can be refilled before you empty it again. If your supply comes on for 4 hours a day at 10 L/min, the maximum water you can collect per day is 2,400 litres. Buying a 5,000-litre tank makes no difference if it will never be full — the practical storage ceiling is what your supply window delivers, not the tank’s nominal capacity.

    This is particularly relevant in cities in Pakistan, India, Bangladesh, and parts of sub-Saharan Africa, where municipal supply may run for 2–6 hours per day or on alternate days. In these settings, the real question is not ‘how big a tank do I need’ but ‘how big a tank can I actually fill given my supply schedule’. Check the how long will my tank last calculator to model whether a proposed tank size is sustainable with your current consumption and fill rate.

    Common mistakes when sizing a replacement tank

    Buying the same size tank that just ran out. If your current tank lasts two days and you want five days of backup, you need roughly 2.5 times the volume. Replacing a 1,000-litre tank with another 1,000-litre tank achieves nothing. The minimum replacement should be based on the calculation above, not on fitting the same space or matching the previous tank’s size.

    Confusing tank capacity with usable capacity. Most tanks cannot be fully drained without a pump — the last 5–15% of volume sits below the outlet pipe. A 1,000-litre tank may deliver only 850–920 litres before the pump loses prime or flow drops. Factor this into your sizing — the buffer in the calculation above partly accounts for this, but high-draw households should check where the outlet is positioned relative to the tank base.

    Ignoring seasonal variation. A household that manages fine in winter may run out in summer because garden irrigation, children home from school, and guest visits push consumption 40–60% above the baseline. Size the tank for the peak demand month, not the average month.

    Not verifying structural capacity before buying a large tank. A 5,000-litre tank full of water weighs 5,000 kg (5 tonnes) plus the tank’s own weight. A rooftop slab rated for 300 kg/m² across a 4 m² footprint supports 1,200 kg — well short of what a 5,000-litre overhead tank requires. Use the rooftop load bearing calculator before committing to any tank larger than 1,000 litres on a rooftop.

    Related calculators you might need

    Once you have established the correct tank size, confirm your roof can hold it with the rooftop load bearing calculator. If cost is a factor in choosing between tank sizes, the water tank cost calculator gives you a cost estimate for different materials and volumes. Households considering adding rainwater harvesting as a supplemental source can use the rainwater harvesting calculator to estimate how much rainfall their roof can collect — in many climates this meaningfully extends tank life between supply events. For apartment buildings sizing a communal tank, the apartment water tank size calculator handles multiple floors and common areas.

    Frequently asked questions

    How big a water tank do I need for a family of 4? At moderate usage (150 L per person per day), a 4-person household uses approximately 600 litres per day. For 3 days of backup, you need roughly 2,000 litres. For 5 days, approximately 3,500 litres including buffer. If supply is unreliable and you want a full week’s reserve, a 5,000-litre tank is the practical minimum. Enter your exact numbers into the water tank size for home calculator for a precise figure.

    Why does my 2,000-litre tank only last 2 days with 4 people? 2,000 litres over 2 days means 250 L per person per day — high but not unusual if the household showers daily, runs a washing machine multiple times per week, and waters a garden. The fix is either a larger tank (3,500–5,000 litres for 4 people seeking 5+ days backup) or reducing daily consumption. Check actual usage first with your water meter before buying a new tank.

    Does tank shape affect how much water I can actually use? Yes. Vertical cylindrical tanks have outlets near the base, maximising usable volume. Horizontal tanks may have the outlet positioned well above the bottom, leaving significant dead volume. For rooftop tanks, a vertical cylinder is almost always the more efficient choice. Check the manufacturer’s outlet position specification before purchase if maximising usable volume matters.

    Is it better to have one large tank or two smaller ones? Two tanks give redundancy — one can be cleaned, repaired, or replaced while the other supplies the household. But they cost more and require more pipework. For most households, one correctly sized tank is the better solution. Two tanks make sense where you want to keep one as an emergency reserve that is never drawn from in normal operation.

    How much does a 5,000-litre water tank cost? Prices vary significantly by material and region. A polyethylene 5,000-litre tank costs approximately $300–600 USD in South Asia, $600–1,200 in Australia, and $800–1,500 in the UK or US. Steel tanks cost more. Installation, platform construction, and pipework add further cost. Use the water tank cost calculator for a location-specific estimate.

  • Why Is There Sediment at the Bottom of My Water Tank?

    Why Is There Sediment at the Bottom of My Water Tank?

    Sediment accumulates in water tanks because suspended particles in the incoming water settle out when flow stops. This is normal to a degree, but a thick sediment layer — more than 1–2 cm — indicates either a high-turbidity source, an absence of inlet filtration, or a tank that has not been cleaned for years. The sediment itself is rarely the most serious issue; the biofilm and bacteria that colonise it are. Any tank with visible sediment buildup should be inspected, cleaned, and its disinfection protocol reviewed.

    Before cleaning, understanding what the sediment is made of tells you how to prevent it from returning. The colour and texture of tank sediment are diagnostic: fine white or grey powder is usually dissolved minerals that have precipitated; brown or rust-coloured grit is iron or manganese from the supply; dark sludge with an organic smell indicates biological growth. Each has a different root cause and a different fix.

    What the sediment colour tells you

    White or chalky deposits are almost always calcium carbonate — the same mineral that furs up kettles and showerheads. Water with high calcium content (above 200 mg/L) precipitates calcium carbonate when it sits still or when temperature fluctuates. This is cosmetically unpleasant and reduces usable tank volume over time, but is not a direct health hazard unless the buildup is supporting bacterial growth on its surface. Use the water hardness calculator to confirm whether your supply has hardness levels that make scaling inevitable.

    Brown, orange, or rust-coloured sediment indicates iron or manganese in the supply water. Iron above 0.3 mg/L and manganese above 0.05 mg/L — both WHO guideline values — will visibly precipitate in a still tank. Beyond aesthetics, elevated manganese is a neurological concern with long-term exposure. If the sediment is brown-orange, test the TDS and mineral content of your incoming water. Use the TDS water calculator to estimate dissolved solids, and have the water tested for iron and manganese specifically.

    Dark grey or black sludge with an organic or sulphurous odour is biofilm and microbial growth. This is the most serious finding. Anaerobic bacteria thrive in tank sediment, particularly in tanks that are rarely cleaned, tanks in warm climates, and tanks where chlorine residual has depleted. Dark sludge requires immediate action: drain the tank, scrub all surfaces, and disinfect with sodium hypochlorite before refilling. Use the water tank disinfection calculator to calculate the correct chlorine dose for your tank volume.

    Sediment colourLikely causeHealth concernPrimary fix
    White/chalkyCalcium carbonate precipitationLow — cosmeticSoftening or acid wash; annual cleaning
    Brown/orangeIron or manganese from supplyModerate — manganese is a long-term concernFiltration at inlet; manganese greensand filter
    Dark sludge, odourBiofilm and anaerobic bacteriaHigh — pathogen riskDrain, scrub, disinfect; improve chlorination
    Sandy or grittySuspended solids from sourceLow if inorganicInlet settling chamber or sediment filter
    Green tinge on wallsAlgae growth (light exposure)Low directly, supports bacteriaBlock all light entry; clean tank

    How sediment builds up and why cleaning intervals matter

    In a typical household tank receiving moderately turbid water, 1–5 mm of sediment per year accumulates at the base. Over five years without cleaning, the bottom 2–3 cm of a tank may be entirely unusable, and the sediment layer provides an ideal substrate for bacterial biofilm. The WHO recommends cleaning potable water storage tanks at least once per year in areas with turbid supply, and every two years where supply is treated and relatively clear.

    Tanks in hotter climates — above 25°C average storage temperature — should be cleaned more frequently. Warm water accelerates bacterial reproduction, reduces chlorine residual faster, and speeds up chemical precipitation. A tank in Karachi or Nairobi left for three years without cleaning will have significantly worse sediment contamination than an equivalent tank in Oslo cleaned on the same schedule.

    Common mistakes with sediment and tank cleaning

    Cleaning the tank without addressing the source. If the incoming water contains high iron, manganese, or suspended solids, the sediment will return within months of cleaning. The correct approach is to install a sediment filter or settling chamber on the inlet pipe before cleaning the tank — otherwise you are cleaning up after a problem that is still actively feeding in. Check the water filter flow rate calculator to select a filter that won’t restrict your refill rate.

    Using high-pressure washing without scrubbing. Pressure washing dislodges surface sediment but does not remove biofilm that has adhered to the tank walls and floor. Biofilm requires physical scrubbing with a stiff brush and a chlorine solution. Tanks that are pressure-washed only will still harbour bacterial communities on surfaces that appear clean.

    Not disinfecting after cleaning. Draining and cleaning removes bulk sediment but leaves the tank surfaces exposed to ambient bacteria during and after cleaning. Refilling without disinfection reintroduces contaminants immediately. After every cleaning, apply a 50 mg/L sodium hypochlorite solution, allow 30 minutes contact time with all surfaces wetted, then drain and refill. Use the chlorine dosage calculator to calculate the exact amount of bleach required for your tank volume and target concentration.

    Allowing light to enter the tank. Algae require light to grow. Tanks with cracked or missing lids, light-coloured translucent walls, or poorly fitted inlet covers will develop algae on the walls regardless of how clean the water is. Algae growth introduces organic matter that supports bacterial growth and contributes to sediment. All potable water tanks must be fully lightproof. Check tank lids and all penetrations annually.

    Related calculators you might need

    After cleaning, the first priority is correct disinfection — the water tank disinfection calculator gives you the precise dose for your tank volume and chlorine product. If testing indicates the sediment is linked to high mineral content, the water hardness calculator can help you determine whether softening is worth the investment. For ongoing monitoring, the safe water storage duration calculator estimates how long water can be stored safely given your storage conditions — useful for establishing realistic cleaning intervals rather than guessing.

    Frequently asked questions

    Is sediment at the bottom of a water tank dangerous? It depends entirely on what the sediment is. Mineral sediment (calcium, iron) at low levels is not a direct health hazard, though it progressively reduces usable storage volume. Dark organic sludge is dangerous — it harbours and protects bacteria from disinfection, and can cause gastrointestinal illness if the tank outlet draws water near the tank floor. Any dark, odorous sediment should be treated as a health risk until the tank is cleaned and water tested.

    How often should I clean my water tank to prevent sediment? For tanks receiving treated municipal supply in a temperate climate: every 2 years minimum. For tanks in tropical climates, areas with high turbidity supply, or tanks that are not covered: annually. For tanks receiving borehole or surface water without treatment: every 6 months. The WHO recommends annual inspection for all potable storage regardless of supply quality.

    Can I remove sediment from my tank without draining it? A tank vacuum or sludge pump can remove bottom sediment without full drainage. This works well for light mineral deposits but is insufficient for biofilm contamination — scrubbing requires the tank walls to be accessible, which means draining. Vacuum removal is acceptable for routine annual maintenance between full cleans, not as a substitute for them.

    Why does sediment keep coming back after I clean my tank? The source water carries suspended particles that settle whenever flow stops. If you clean the tank but do not filter the inlet, sediment returns at the same rate as before. Install a 10–20 micron sediment filter on the tank inlet — this captures the bulk of suspended solids before they enter the tank. Replace the filter cartridge every 3–6 months depending on how quickly it loads.

    What chemical can I use to dissolve mineral scale in my tank? For calcium carbonate scale (white deposits), a diluted citric acid solution (1–2%) dissolves the scale without damaging polyethylene or fibreglass tank walls. Apply, leave for 30 minutes, scrub, then rinse thoroughly before disinfecting and refilling. Do not use hydrochloric acid in food-grade tanks — it attacks the tank material and is difficult to rinse completely.